Key Takeaways
- An offline film edit typically takes between 12 to 24 weeks depending on the complexity of the footage.
- Color grading a feature-length independent film usually requires three to seven full days in a dedicated grading suite.
- Sound design and re-recording mixing generally span four to six weeks in a professional mixing studio.
- Quality control passes for streaming and theatrical distribution typically cost between INR 30,000 and 75,000 per pass.
- Exporting separate audio stems is essential for creating foreign language versions and future accessibility mixes.
You have your hard drive on your desk. Inside it are three hundred hours of raw camera files, scratch audio tracks recorded on a boom mic that was clipping half the time, and thirty interview cards from a documentary shoot that never used a slate. The director wants to see a rough assembly by Friday, the colorist is asking for proxy codecs you haven't rendered yet, and your producer just realized nobody budgeted for the QC pass required by the streaming platform.
Post-production is where independent films go to die quietly. It doesn't happen because your director lacked vision or your actors forgot how to cry on cue. It happens because the technical pipeline—the fragile handoffs of data, codecs, metadata, and audio stems between picture, sound, and color—snapped under the weight of poor organization. If you treat the editing bay like a dumping ground for media, the schedule will collapse by 4 PM on a Tuesday, and you will spend your contingency budget fixing mistakes that a five-minute conversation on day one could have prevented.
Let's look at how the machinery actually works, what it costs, and where everyone gets it wrong before the DCP is burned.
Preparing Your Footage for the Offline Edit#
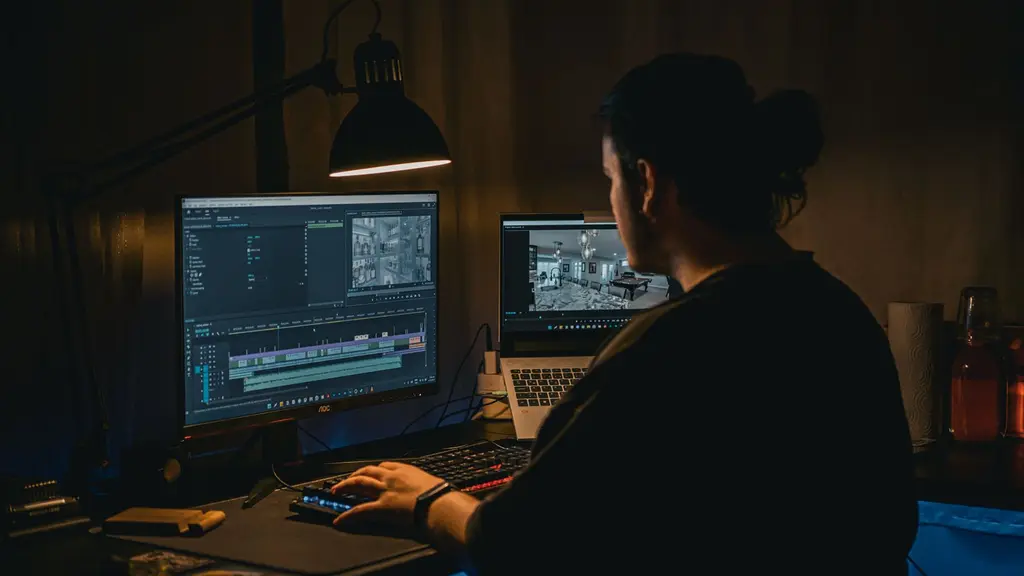
You cannot cut a feature film if your editing drives sound like a jet engine trying to ingest uncompressed 8K RAW files straight from the camera card. The offline edit is where you build the story using low-bandwidth proxy files, and it typically takes between 12 to 24 weeks depending on the complexity of your narrative and whether you are cutting fiction or documentary footage. For a sense of scale, the editing room workflow on Gangs of Wasseypur required handling over 300 hours of raw footage, showcasing the sheer organizational scale of multi-part independent features where a single mislabeled card can sink an entire week of assembly.
Before a single clip hits the timeline, you need to establish a uniform proxy workflow. Transcode your camera originals into a lightweight editing codec—Apple ProRes Proxy or Avid DNxHR LB—while maintaining exact timecode matching and file naming conventions from the set. If your sound recordist handed over dual-system audio with wild double-system drift, synchronize your production tracks to your video files using timecode sync or waveform matching before you hand anything to your assistant editor. Never let anyone start cutting with a scratch track—the low-quality, on-camera microphone audio meant only as a temporary reference—because replacing sync audio later becomes an impossible puzzle if your clip durations drift.
Keep your camera originals untouched
Organizing the Editing Suite and Project Bins#
A messy project file is a symptom of panic. If your bins are labeled "Misc Footage," "Final Cut 2," and "Check This," your editor is spending half their day hunting for media instead of finding the emotional spine of your scene. You need a rigid folder structure inside your editing software before you import a single asset: footage, audio, graphics, sync maps, and sequences must live in designated bins with standardized naming rules that match your script supervisor's continuity logs.
When you are structuring complex narrative arcs or rearranging scenes across acts, you need a clear workspace to visualize the macro structure before you start trimming frames in the timeline.
Act I
The heist crew splits the cash in an abandoned mill
Act II
The bag contains a GPS tracker left by the syndicate
Act III
Headlights sweep across the corrugated iron walls
In Scriptory: Beat Board
Index cards in three act columns, drag to reorder, and a one-click pull that cards every scene heading the script already has.
Where: Editor — Beat board tab
Building your beats visually keeps the narrative moving without getting bogged down in individual clip trims. Once your bins are locked down and your selects reels are pulled, your editor can move through the script pages methodically.
Picture Lock and the Online Conform Process#
The most expensive word in independent filmmaking is "re-edit." When a producer tells you they want to swap a shot out after the picture is supposedly finished, they are triggering a catastrophic chain reaction known as breaking the conform. The online edit is the stage where your low-resolution proxy timeline is relinked back to the original uncompressed camera files for final finishing, color grading, and visual effects output.
If you trim three frames off the head of a shot in the offline edit after color grading has already begun, the colorist's grade will slide out of sync across the entire cut. Conform is the technical process of matching your offline editing timeline back to the high-resolution source files using timecode and reel metadata.
The conformity checklist
- 1
Lock the picture
Do not touch a single frame once sound and color begin.
- 2
Export an XML or AAF
Send this timeline data to the finishing suite.
- 3
Relink source media
Verify that every raw camera file matches the offline cuts exactly.
- 4
Check sizing and framing
Confirm that any crop or re-framing done in proxy scales correctly to 4K.
Never declare picture lock until every single department head has signed off on the technical delivery specs. Locking early to save time always costs money later.
Color Grading and Managing the Look#
Color grading is not just slapping a teal-and-orange filter over your footage and calling it a cinematic masterpiece. Color grading sessions for an independent feature using DaVinci Resolve usually require 3 to 7 full days with a professional colorist, assuming your conform timeline is clean and your shots have been properly balanced. If your production shot on different camera sensors without matching color science or exposure charts, your colorist will spend the first three days just trying to make scene twelve look like it takes place in the same room as scene eleven.
Before you sit down for the grade, make sure you understand how to use 7 Best Free LUTs You Need to Make More Cinematic Videos without destroying your highlight roll-off. A lookup table (LUT) is a mathematical formula that translates color data, but applying a heavy conversion LUT to poorly exposed log footage will instantly crush your shadows into unrecoverable noise. Work with your cinematographer during pre-production to establish a show LUT, and stick to it religiously through production and post.
Print Master
The final, fully mixed and mastered audio file synchronized with the color-graded picture, ready for distribution duplication.
Once the grade is approved, your colorist will render out master plates, usually in a high-bitrate image sequence like DPX or OpenEXR, ensuring that your final export retains every ounce of dynamic range your camera sensor captured.
Dialogue Cleanup and Sound Design#
Audiences will forgive a soft focus or a slightly blown-out highlight, but they will walk out of a screening if they cannot understand the dialogue. Post-production sound supervision starts during the edit offline, with dialogue editors cleaning up production tracks, removing room tone hums, and identifying clipped words before automated dialogue replacement (ADR) is scheduled. If your production mixer didn't get clean lavalier tracks on the day, you are staring down the barrel of expensive emergency ADR sessions where actors try to match their lip movements to a studio microphone weeks later.
The atmosphere of an indie film lives and dies in the sound design. Think of the meticulous work behind the sound design of Tumbbad, which utilized layered ambient soundscapes and specialized Foley work over a period of months to build its distinct atmospheric horror aesthetic. To understand how sound builds tension in genre filmmaking, look closely at Best Horror Movie Soundtracks — Top 10 Scary Good Scores to see how low-frequency drones and sudden acoustic drops manipulate viewer psychology long before a monster enters the frame.
Clean your production tracks early
The Final Re-Recording Mix and Stems#
You have your dialogue cleaned, your Foley tracks recorded, and your score locked. Now comes the re-recording mix, where all those disparate sonic elements are balanced into a cohesive acoustic environment. Sound design and final re-recording mixing on an indie feature generally span 4 to 6 weeks in a dedicated Dolby Atmos or 5.1 mixing studio. This is where the dialogue sits comfortably in the center channel, the sound effects move across the soundstage, and the music breathes around the actors' performances.
The biggest mistake independent filmmakers make at this stage is failing to export separate audio stems—individual mixed tracks grouped by category, such as dialogue, music, and sound effects—during the final mix.
Scriptory Resource
Tag your script instead of retyping it
Scriptory pulls props, cast and locations straight off the page.
If you only export a single stereo master mix, foreign distributors will be unable to dub your film into another language or adjust subtitle timing without ruining the underlying music track. Always demand a full M&E (Music and Effects) stem package alongside your primary print master.
Generating DCPs and Festival Deliverables#
When your film is finally finished, you cannot simply drop an MP4 file onto a flash drive and hand it to a festival projectionist. You need a DCP (Digital Cinema Package), which is the standardized digital format required by commercial movie theaters and film festivals worldwide. Generating a DCP requires converting your ProRes master into XYZ color space, wrapping the files into MXF containers, and building XML playlist structures that digital cinema servers can read without crashing.
Visual effects shots for a modest indie film range from 20 to 100 shots, often outsourced to boutique studios charging per shot based on complexity. Those VFX shots must be locked, graded, and rendered out at native theatrical resolution before your post house can compile the final DCP package. Never leave DCP generation to the night before your festival premiere; projection testing takes time, and discovering an audio sync offset or a missing subtitle track five minutes before the red carpet will ruin your opening night.
Quality Control and Final Archive#
You are at the finish line, but streaming platforms and distributors will not accept your film without a rigorous technical evaluation. Deliverables for streaming platforms like Netflix or theatrical distribution require strict quality control (QC) passes, costing between INR 30,000 to 75,000 per pass. A human technician, backed by automated error-checking software, will scrub your file frame by frame looking for audio dropouts, illegal color gamuts, dead pixels, and subtle phase cancellation issues.
If the QC report flags a single frame of digital noise or an out-of-phase audio click at minute 42, you have to fix the master, re-export, and pay for the QC pass all over again. Once you finally pass inspection, build a comprehensive LTO tape archive or redundant cloud backup containing your offline project files, raw camera originals, graded master plates, audio stems, and final delivery packages. Store them in separate geographic locations so that when the hard drives eventually fail—and they always fail—you still have a movie left to distribute.
Frequently Asked Questions
Quick answers to what people ask about this topic.
What is picture lock in film editing?
Picture lock is the crucial milestone in post-production where the edit of the film is finalized and no further cuts or changes to the visual timeline can be made. Reaching picture lock allows sound designers, composers, and colorists to begin their final work without the risk of their timing drifting out of sync when new shots are added or removed.
How long does the post-production process take for an independent film?
The post-production process for an independent feature film typically takes between three to six months. This timeline includes offline editing, sound design, color grading, visual effects, and generating final deliverables like DCPs and streaming masters, though complex indie projects can extend beyond this window.
What are audio stems in film sound mixing?
Audio stems are grouped sub-mixes of the final soundtrack, typically separated into Dialogue, Music, and Effects (often referred to as DME stems). Filmmakers require these separate tracks for international distribution, foreign language dubbing, and creating accessible mixes for television and streaming platforms.
What is a conform in video editing and color grading?
A conform is the technical process of rebuilding the offline editing timeline in a high-resolution finishing software using the original camera raw files. This ensures that the colorist and online editor are working with the highest possible image quality for the final export and theatrical deliverables.
Format your script for free
Stop fighting Word margins. Scriptory formats your screenplay to industry standard as you type, then turns it into a breakdown, a schedule and a call sheet.
Open Scriptory Now